ODF Operator Quick Start
This document will describe the installation of the Local Storage Operator (LSO) and OpenShift Data Foundations (ODF). LSO is a pre-requisite for installing ODF on OpenShift nodes that will use local block devices.
Important
This quick start is based on OCP 4.20.
Warning
With 4.12 we found that hugepages needed to be disabled before installing ODF, otherwise noobaa pods won’t start correctly. This can be re-enabled afterwards. I have NOT retested this on newer code.
Local Storage Operator
Important
You must configure the Local Storage Discovery and VolumeSet before configuring ODF. In previous versions, the ODF wizard did this for you but now only works with SSD’s as HDD’s are not supported. To work-around this requirement simply create the Local Storage objects first.
From the Web Console go to .
In the Filter by keyword box type, “local storage”.
Select “Local Storage” operator and click “Install”.
Leave/accept the defaults and click “Install”.
Watch progress.
watch oc get po -n openshift-local-storage
Upon completion, click “View Operator”.
Go to “Local Volume Discovery” tab and click “Create LocalVolumeDiscovery”.
Expand “NodeSelector” section and “Remove nodeSelectorTerms”.
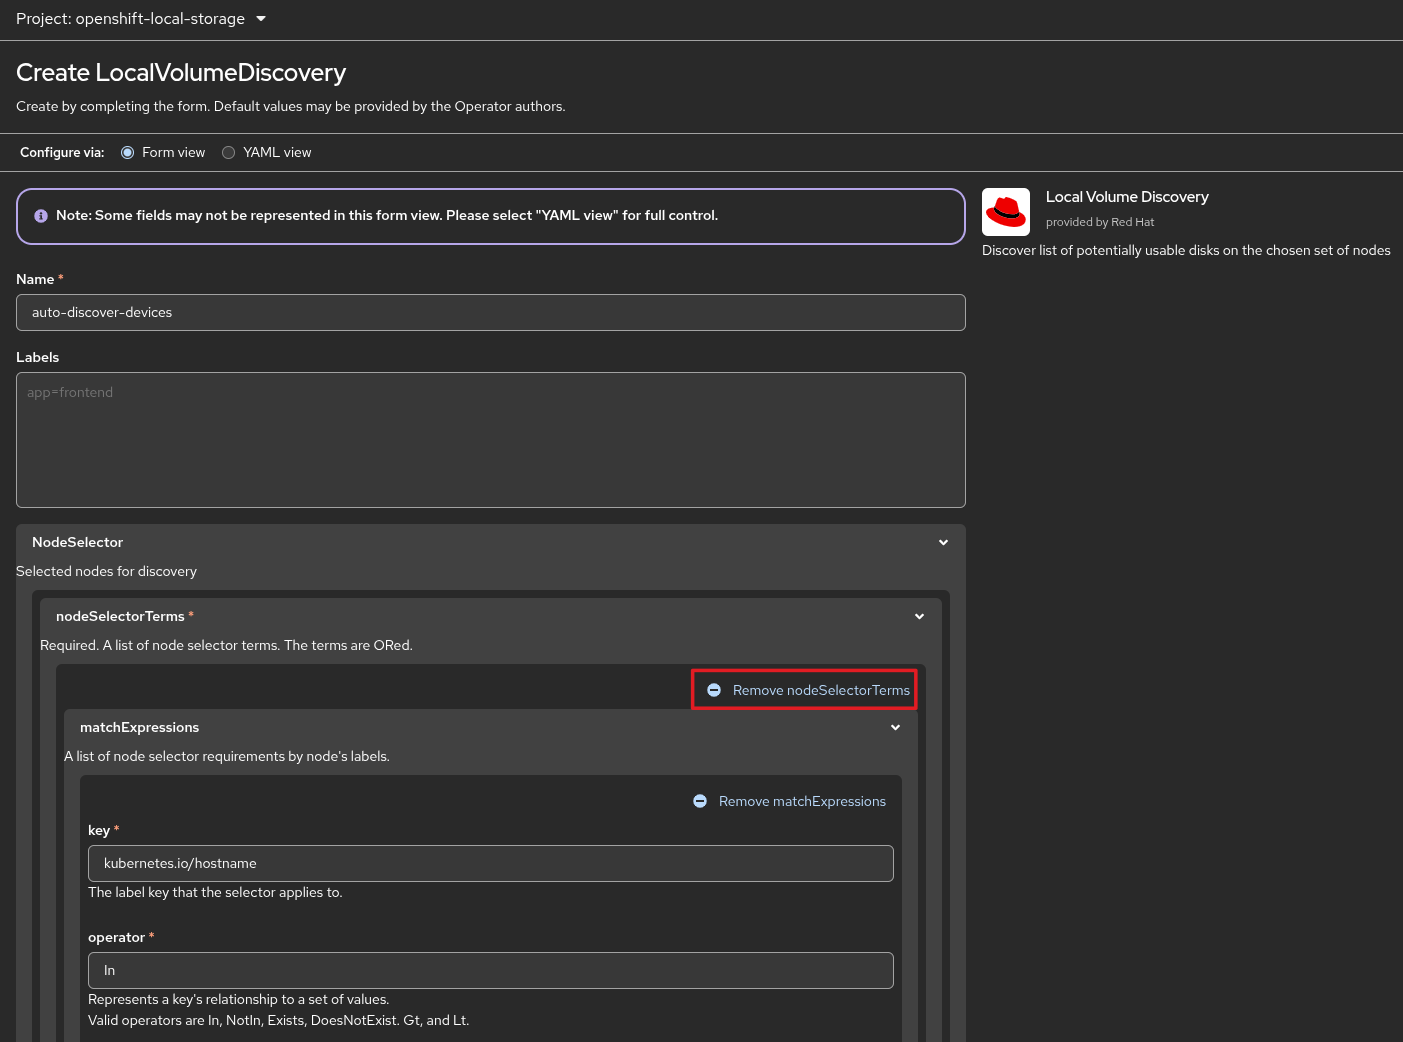
Click “Create”.
Go to “Local Volume Set” tab and click “Create LocalVolumeSet”.
Set Name and StorageClassName.
Expand NodeSelector section and “Remove nodeSelectorTerms”.
Change configure via “Form view” to “YAML view”.
Remove the lines minSize and maxSize (or set to your preference).
Click “Create”.
Confirm success. A new pod per block device, “diskmaker-manager-xxxxx” should be created/running.
oc get po -n openshift-local-storage
Note
Before starting the next section, ODF Operator, confirm new PV block devices. Go to .
ODF Operator
From the Web Console go to .
In the Filter by keyword box type, “Data Foundation”.
Select “OpenShift Data Foundation” operator and click “Install”.
Enable “Console plugin”.
Leave/accept the other defaults and click “Install”.
Watch progress.
watch oc get po -n openshift-storage
Upon successful deployment go to next section.
Configure ODF
From the web console go to .
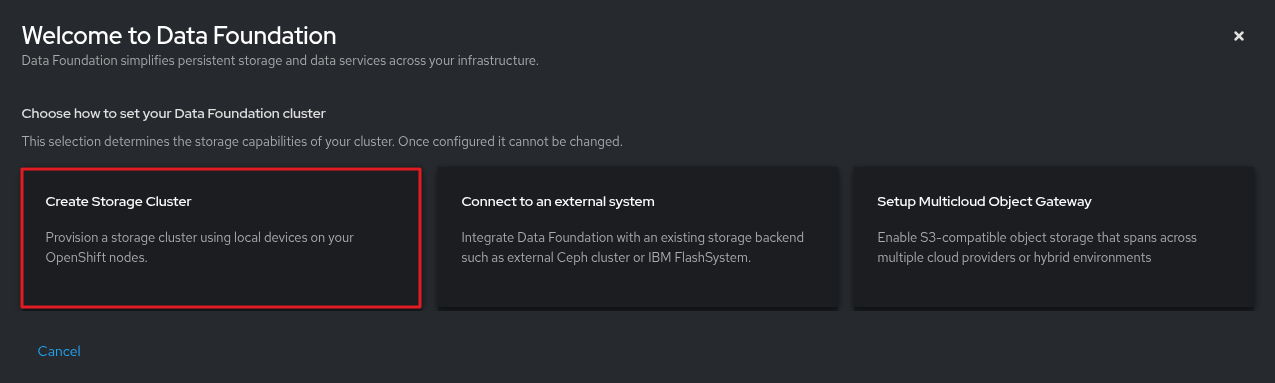
Click “Configure Data Foundation”.
Select “Create Storage Cluster”.
Select “Use an existing StorageClass”.
In the drop down box select the storage class previously created in the Local Storage operator section.

Leave other defaults and click Next.
Confirm “Available raw capacity” and selected nodes. Configure perforamance, if unsure leave default “Balanced mode”.
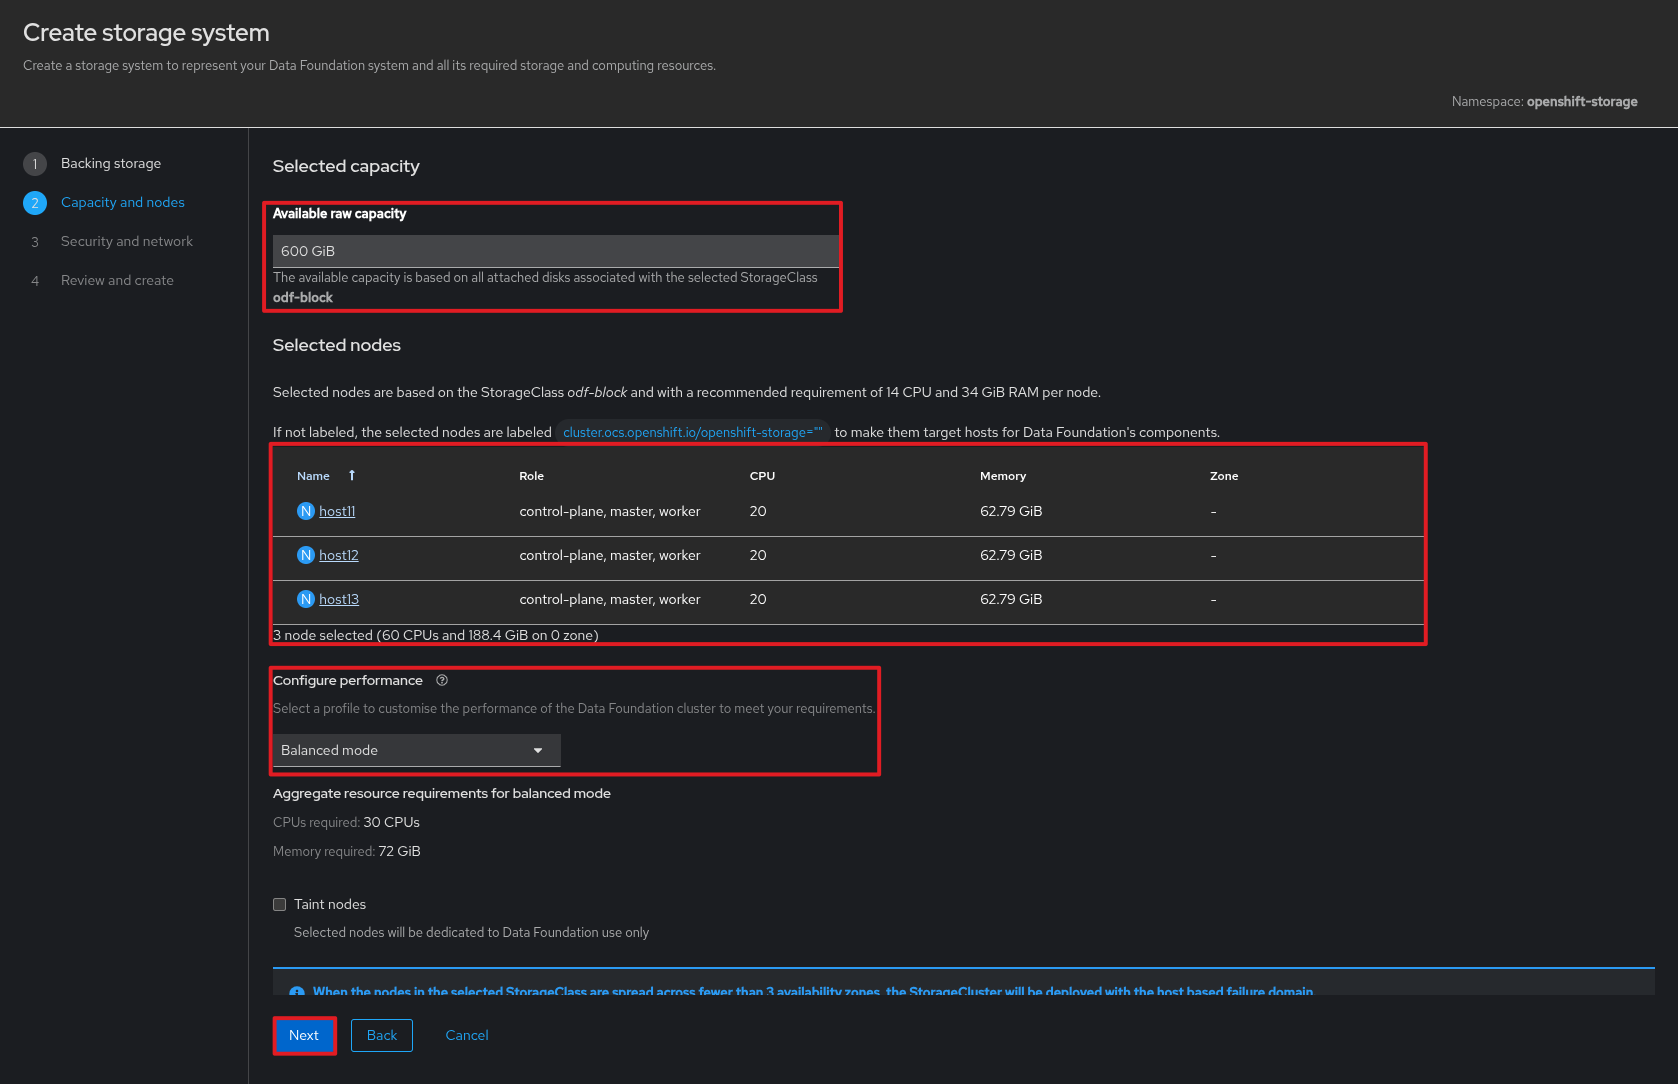
Click Next.
Enable Security and network. Make changes appropriate to your environment. I use the defaults.
Click Next.
Review the information. If acceptable click “Create storage system”.
Watch progress.
watch oc get po -n openshift-storage
Note
This can take several minutes to complete.
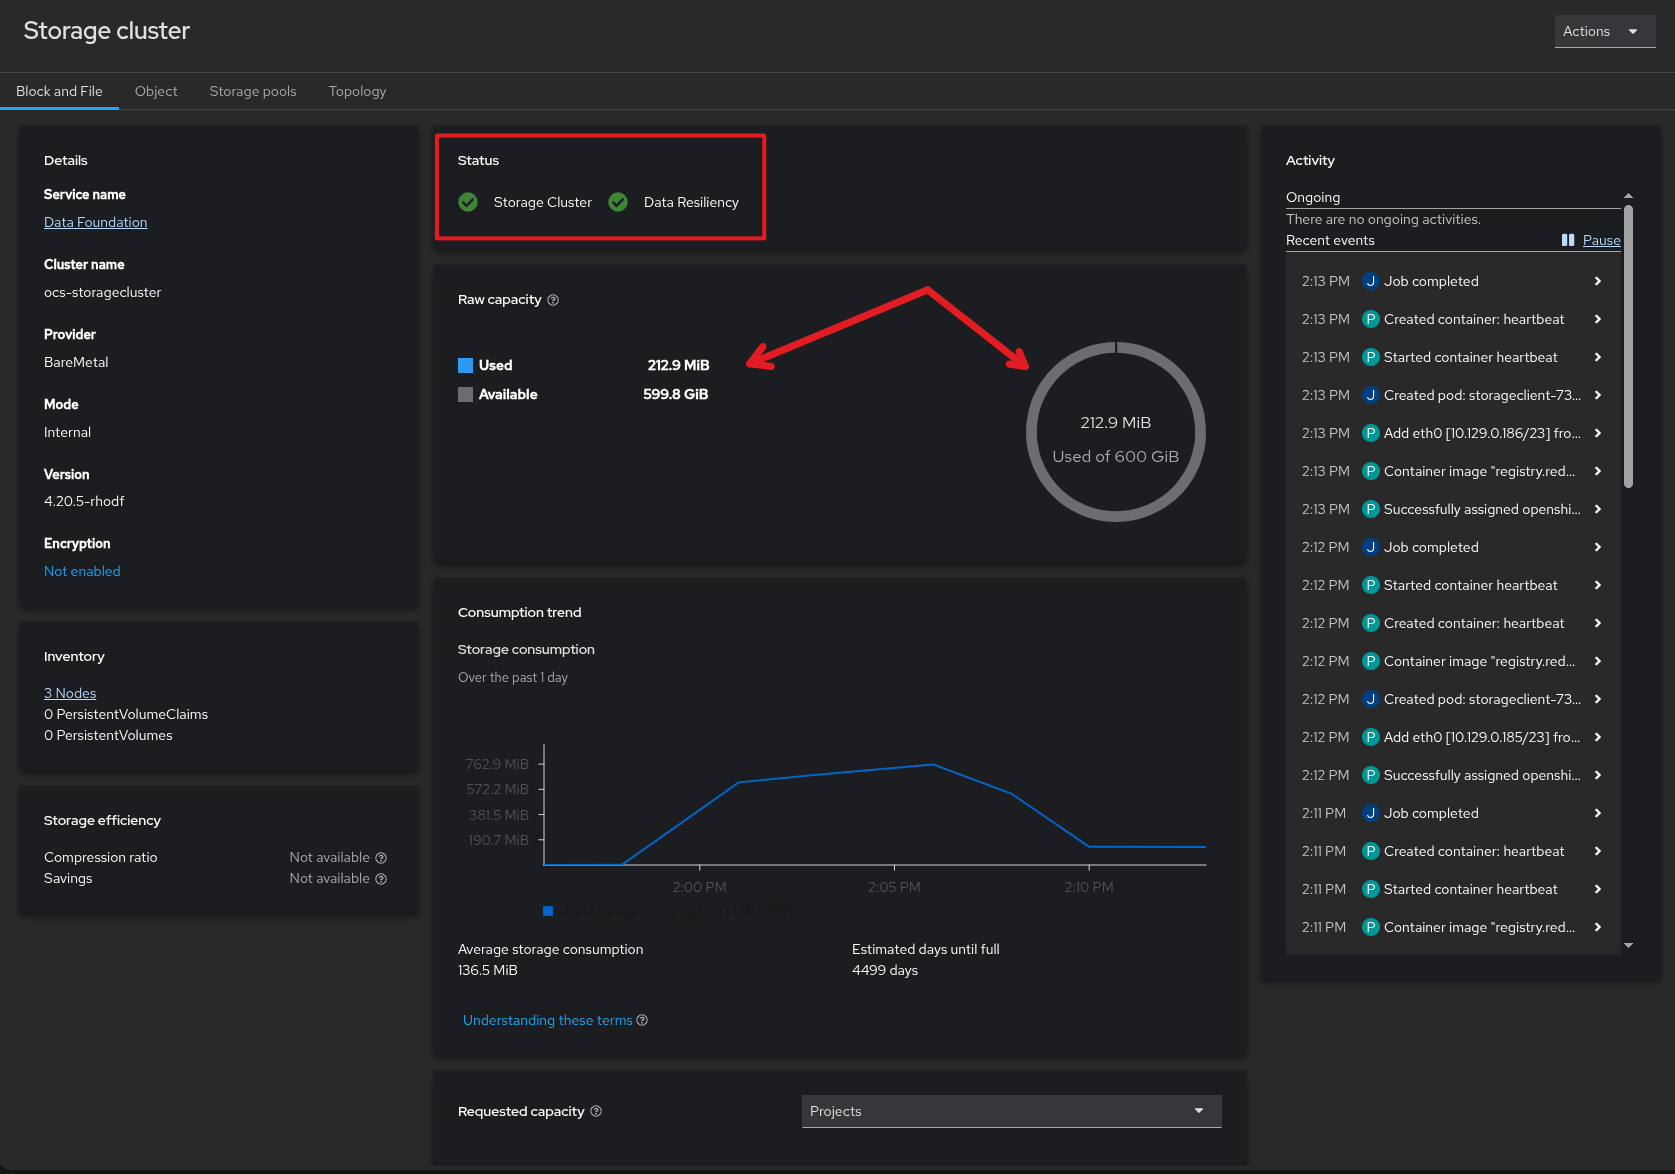
Verify storage cluster from the Web Console. Go to
Verify default storage class.
Note
Ceph block is the default (ocs-storagecluster-ceph-rbd)
oc get sc

(OPTIONAL) If you prefer a different default storage class use the following command. In this example I set Ceph fs (ocs-storagecluster-cephfs).
oc patch storageclass ocs-storagecluster-cephfs --patch '{"metadata": {"annotations": {"storageclass.kubernetes.io/is-default-class": "true"}}}'
Optional: Disable NooBaa
NooBaa is multicloud object gateway and may not be needed in your environment. The following steps walk through disabling the function freeing up resources.
Change to openshift-storage project, or append “-n openshift-storage” to each patch command below.
oc project openshift-storage
Edit storagecluster ocs-storagecluster and add strategy.
oc patch storagecluster ocs-storagecluster --type merge --patch '{"spec":{"multiCloudGateway":{"reconcileStrategy":"ignore"}}}'

# oc edit storagecluster ocs-storagecluster
# spec:
#   multiCloudGateway:
#     reconcileStrategy: ignore
Edit NooBaa and add allow deletion.
oc patch noobaa noobaa --type merge --patch '{"spec":{"cleanupPolicy":{"allowNoobaaDeletion":true}}}'

# oc edit noobaa noobaa
# spec:
#   cleanupPolicy:
#     allowNoobaaDeletion: true
Remove NooBaa objects.
oc delete noobaas.noobaa.io --all