Local Storage Operator Quick Start
This document describes the installation of the Local Storage Operator(LSO). This is a simple way to allocate local storage for the image registry.
Install and Configure the Local Storage Operator
From the Web Console go to
In the Filter by keyword box type, “local storage”
Select “Local Storage” operator

Click “Install”
By default, the “openshift-local-storage” namespace will be used. Accept the defaults and click “Install”
After install completes click “View Operator”
Select the “Local Volume Discovery” tab
Click “Create Local Volume Discover”
Under “Node Selector” select the option based on your environment
Click “Create”
After this completes go to
In the search box search for “LocalVolumeDiscoveryResult” and click on the discovered object “LocalVolumeDiscoveryResult”
Select the “Instances” tab

Click the first instance name, click the YAML tab, and scroll to the bottom of the output. The last device, in this labs case “/dev/vdb” should be the correct device. Make note of the “deviceID”. Also note this device should show as “Available”.
Important
Using the “deviceID” will prevent future issues from happening if for some reason the order of the drives change.
Repeat step 14 for each discovered instance
Go to and select “Local Storage” operator
Select the “Local Volume” tab and click “Create Local Volume”
Important
This will automatically create pv’s that consume the entire device. If smaller pv’s are required, partition the device before creating the Local Volumes.
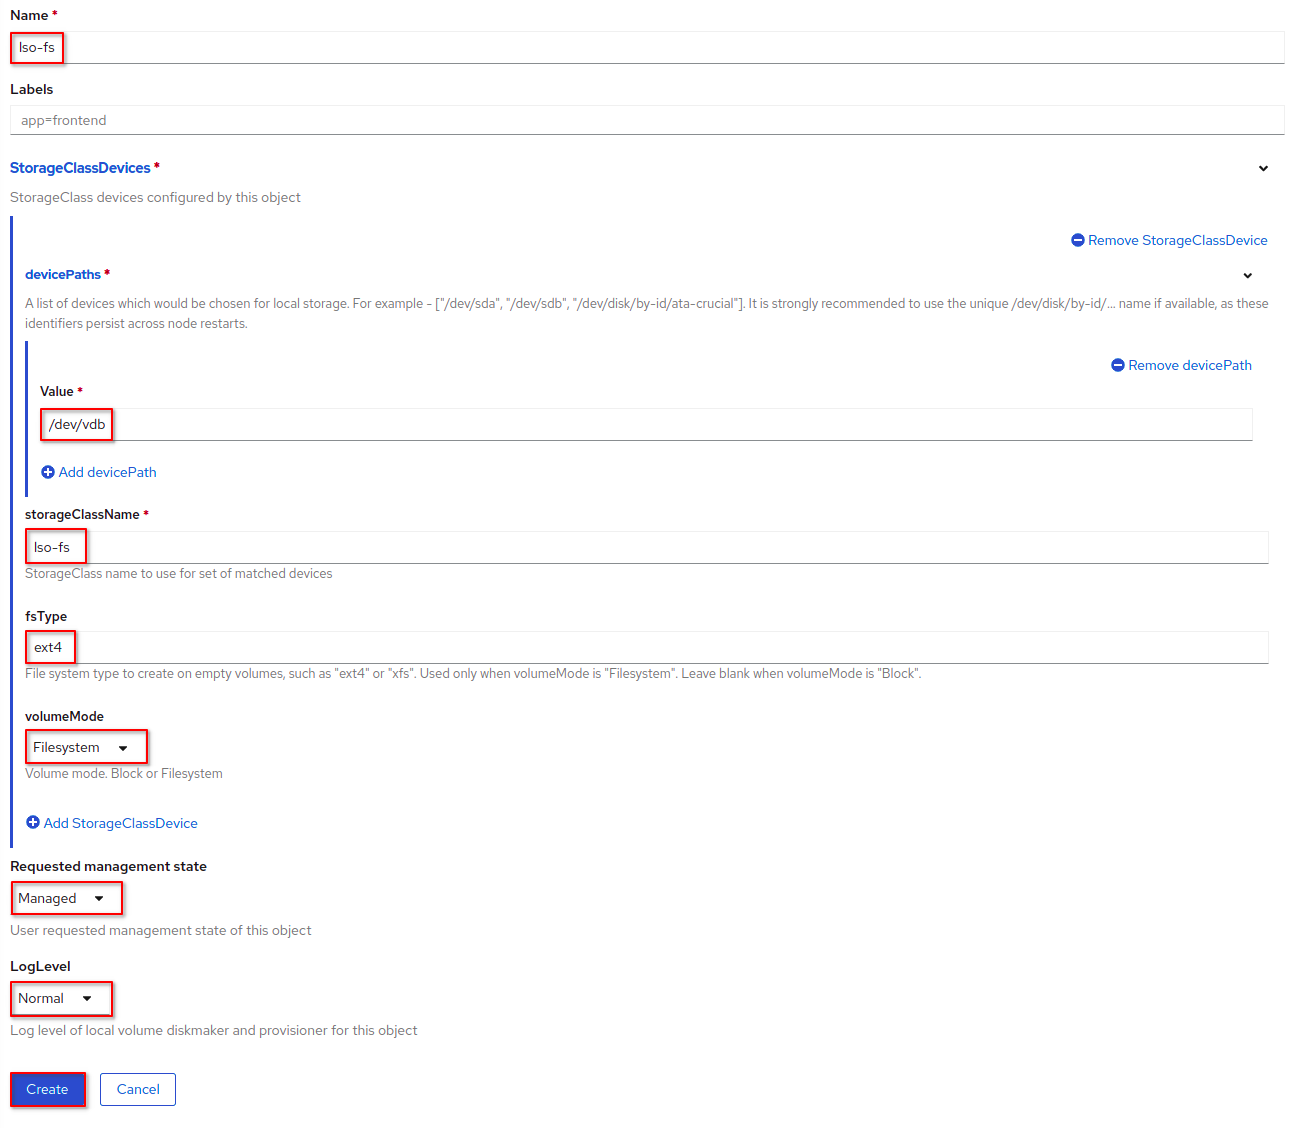
Name the new volume, example “lso-fs”
Expand “StorageClassDevice” by clicking the carrot to the right of the section
Expand “Device Paths” again by clicking the carrot to the right of the section
Add all the deviceID’s recording in step 14
Name the Storage Class Name, example “lso-fs”
Set “Fs Type” = ext4
Set “Volume Mode” = Filesystem
Set “Requested management state” = Managed
Set “LogLevel” = Normal
Click Create