Assisted Install Notes
Prerequisites
Before starting have a naming and IP plan. The following is based on static IP.
Cluster name; ex. ocp1
Base domain; ex. lab.local
Have each Nodes primary interface Name and MAC Address.
Static IP
Each node an assigned IP
API VIP (assigned to the DNS Record)
Ingress VIP (assigned to the DNS Record)
DNS Records
api.ocp1.lab.local.
api-int.ocp1.lab.local.
*.apps.ocp1.lab.local.
“A” records for each host/node
“PTR” records for each host/node
Tip
Check disk performance for etcd with “fio”. It’s critical to have a high performing disk drive for OCP / etcd.
For more info: How to Use ‘fio’ to Check Etcd Disk Performance in OCP
podman run --volume /var/lib/etcd:/var/lib/etcd:Z quay.io/openshift-scale/etcd-perf
Method of Procedure
Connect to https://console.redhat.com/openshift/overview and authenticate.
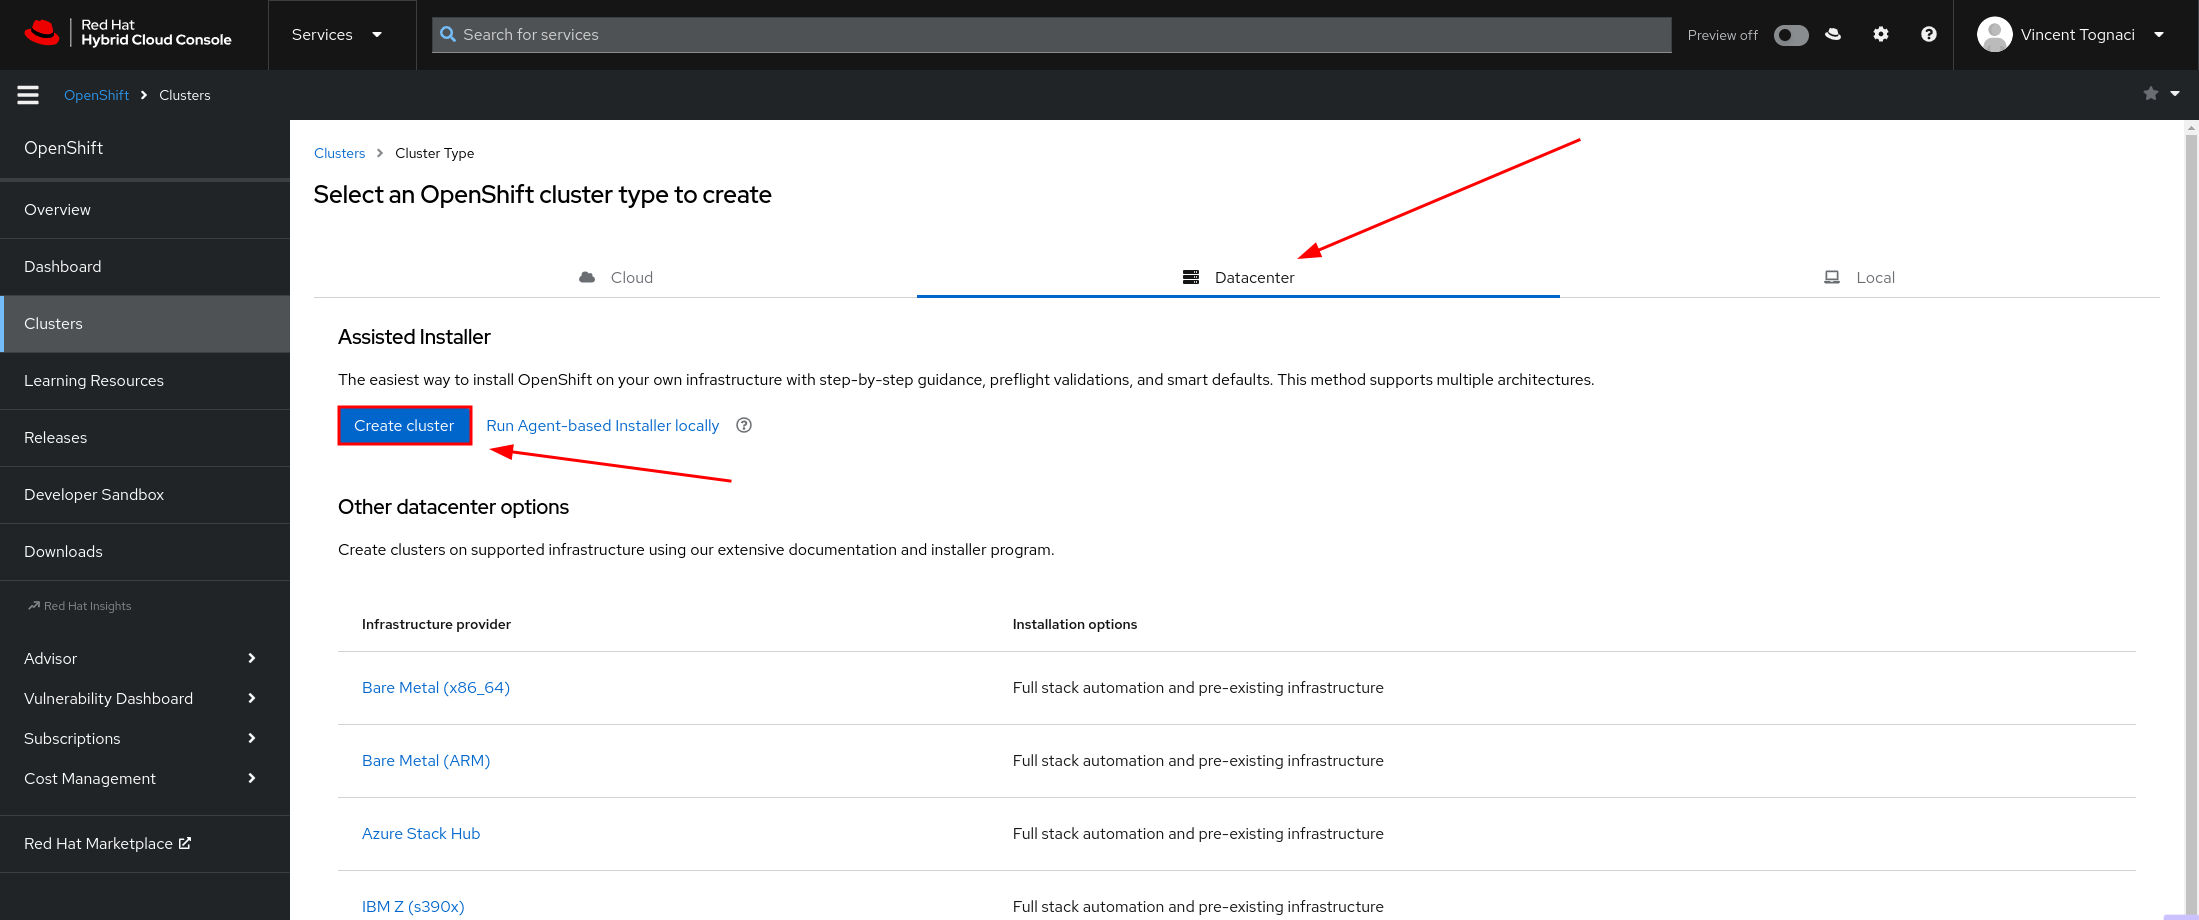
Select “Create Cluster”

Click the “Datacenter” tab and click “Create Cluster”. This starts the Assisted Intaller.
Cluster details
Cluster name
Base domain
OpenShift version
Hosts’ network configuration
Important
Be sure to select “StaticIP, bridges, and bonds”. This option allows for a custom network config with the deployment.
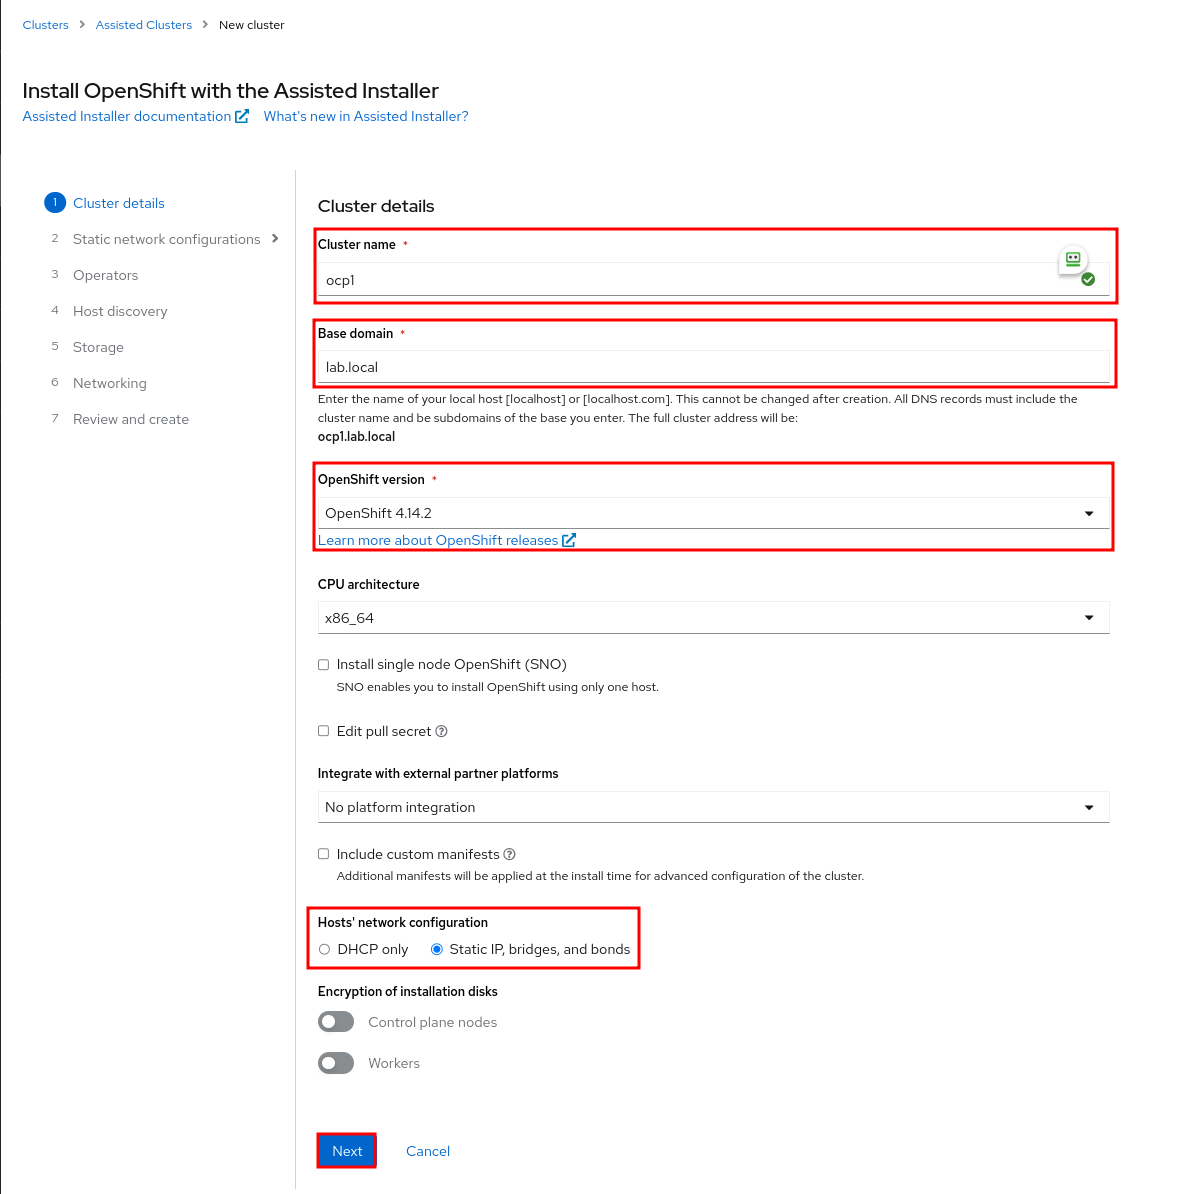
Click “Next” when ready.
Static network configurations
Select “YAML view” and click “Start from scratch”.
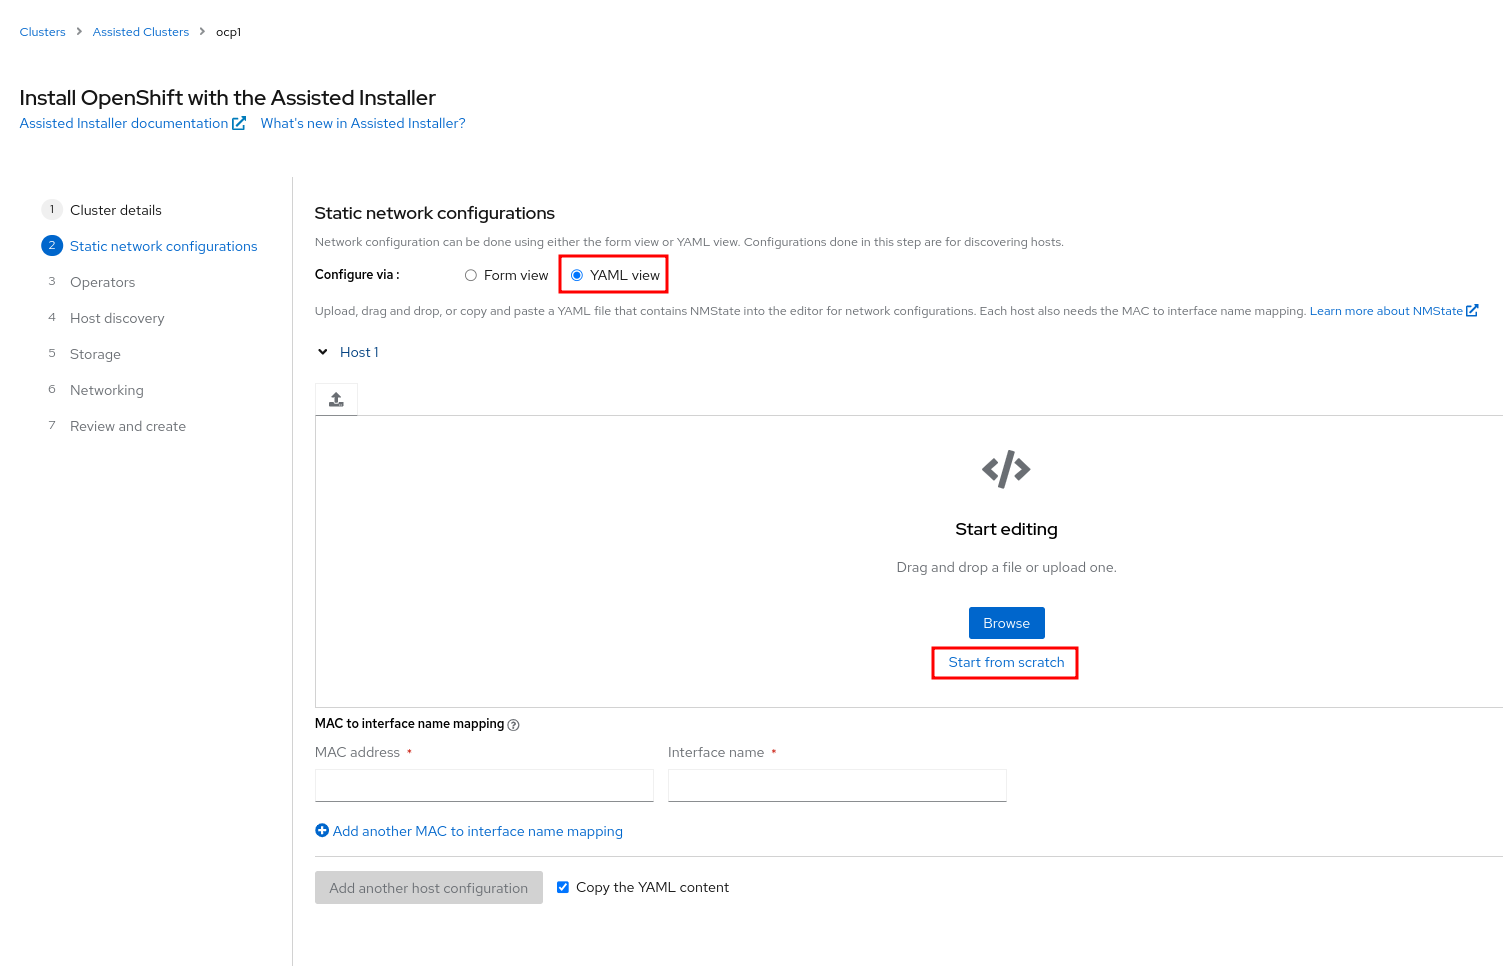
For each host add the Network(yaml), MAC address and Interface name.
Note
Several examples are included below, Static Network Examples
Attention
Each interface in use should be defined here.

Click “Next” when ready.
Operators
Leave the defaults (Nothing selected)
Click “Next”.

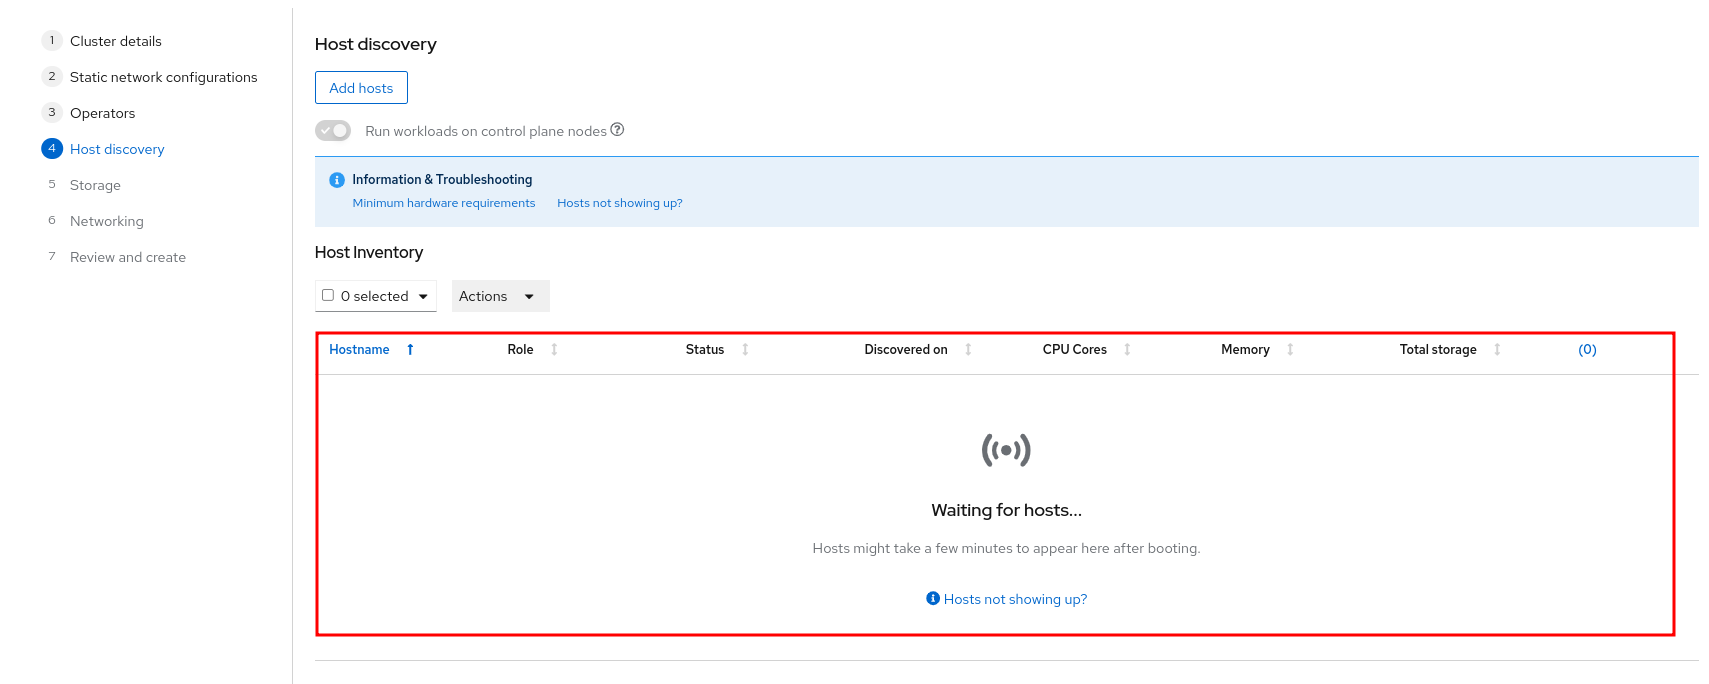
Host discovery
Click “Add hosts”

Set Provisioning type = “Full image file - Download a self-contained ISO”
Add the “SSH public key”
If required set “proxy settings”
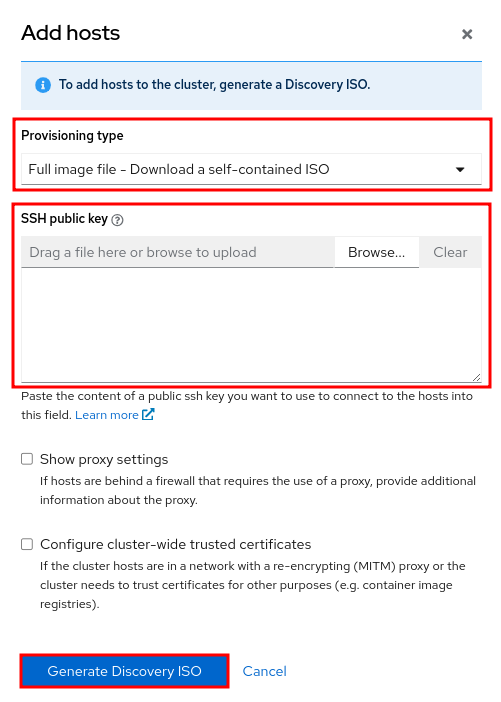
Click “Generate Discovery ISO” when ready.
Download Discovery ISO
Boot hosts from ISO
Wait for hosts to be discovered.
Note
At least three hosts are required to move forward.
If needed adjust Hostname and Role.
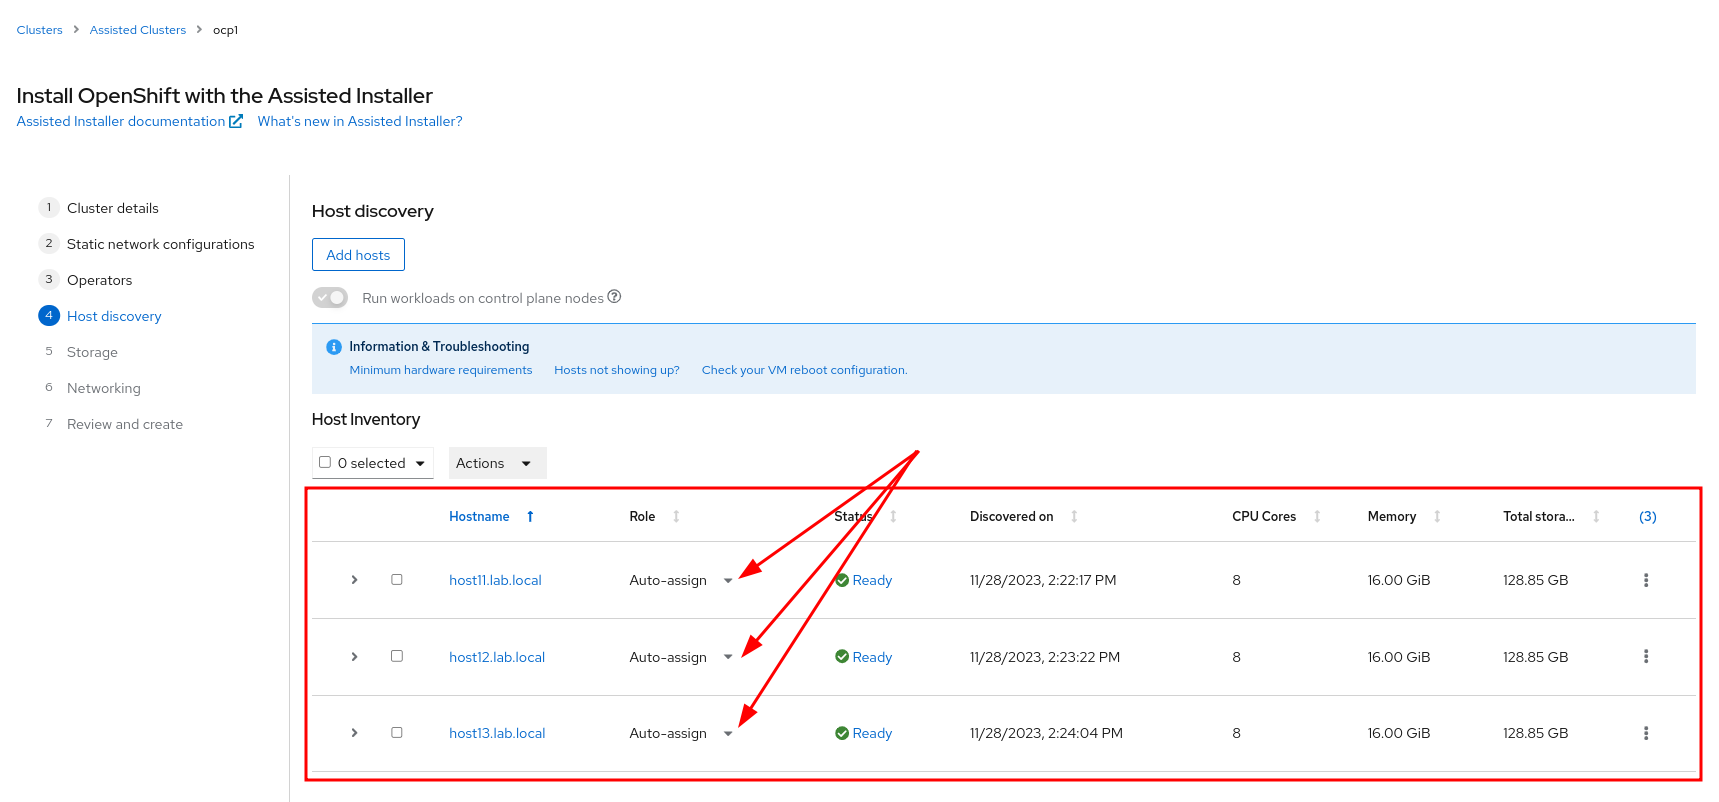
Click “Next”.
Storage
If needed adjust hosts target storage device for install.
Click “Next”.
Networking
Add “API IP”
Add “Ingress IP”
Click “Next”

Review and create
Review Cluster summary
Click “Install cluster”
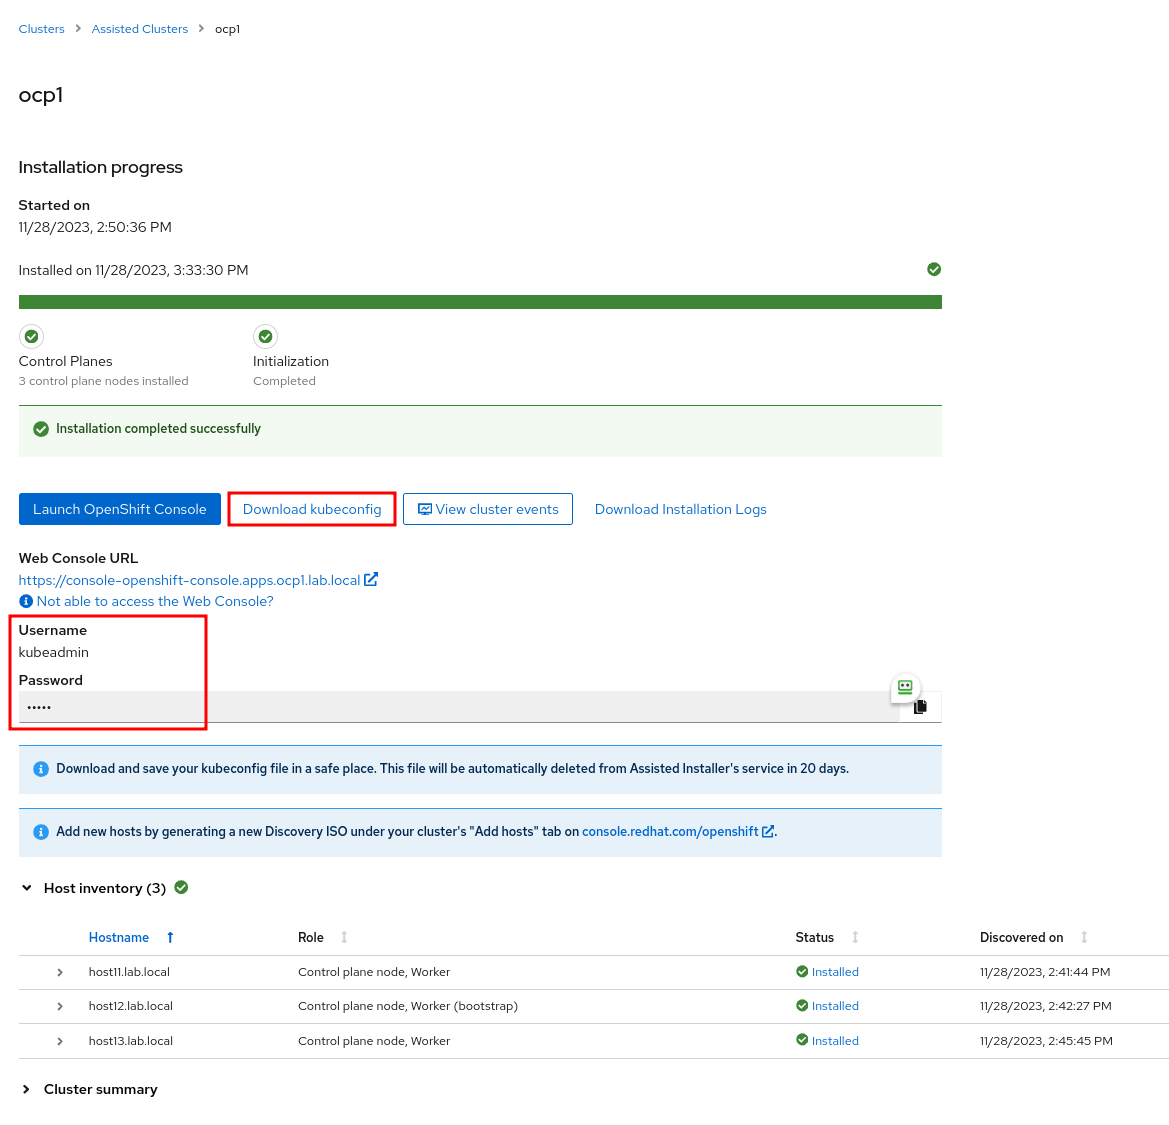
You can view the progress by watching the “Host inventory” and clicking “View cluster events”

Important
Be sure to “Download kubeconfig” and Save “kubeadmin Password”
Static Network Examples
The following are static network configurations when manually configuring “Static IP, bridges, and bonds”.
interfaces:
- name: enp1s0
  type: ethernet
  mtu: 1500
  state: up
  ipv4:
    enabled: true
    dhcp: false
    address:
    - ip: 192.168.122.21
      prefix-length: 24
  ipv6:
    enabled: false
dns-resolver:
  config:
    search:
    - lab.local
    server:
    - 192.168.1.68
routes:
  config:
  - destination: 0.0.0.0/0
    next-hop-address: 192.168.122.1
    next-hop-interface: enp1s0
    table-id: 254
interfaces:
- name: enp1s0
  type: ethernet
  mtu: 1500
  state: up
- name: enp1s0.122
  type: vlan
  state: up
  vlan:
    base-iface: enp1s0
    id: 122
  ipv4:
    enabled: true
    dhcp: false
    address:
    - ip: 192.168.122.21
      prefix-length: 24
  ipv6:
    enabled: false
dns-resolver:
  config:
    search:
    - lab.local
    server:
    - 192.168.1.68
routes:
  config:
  - destination: 0.0.0.0/0
    next-hop-address: 192.168.122.1
    next-hop-interface: enp1s0.122
    table-id: 254
interfaces:
- name: enp1s0
  type: ethernet
  mtu: 1500
  state: up
- name: enp2s0
  type: ethernet
  mtu: 1500
  state: up
- name: bond0
  type: bond
  mtu: 1500
  state: up
  link-aggregation:
    mode: active-backup
    port:
    - enp1s0
    - enp2s0
- name: bond0.122
  type: vlan
  state: up
  vlan:
    base-iface: bond0
    id: 122
  ipv4:
    enabled: true
    dhcp: false
    address:
    - ip: 192.168.122.21
      prefix-length: 24
  ipv6:
    enabled: false
dns-resolver:
  config:
    search:
    - lab.local
    server:
    - 192.168.1.68
routes:
  config:
  - destination: 0.0.0.0/0
    next-hop-address: 192.168.122.1
    next-hop-interface: bond0.122
    table-id: 254