Advanced Cluster Management
Install ACM
Basic ACM install to get started.
Tip
Be sure to have enough cpu, memory, and storage. My lab is KVM based. For ACM I start with a three node cluster, each node has 16 cores, 32G memory, and small 600G ODF/Ceph deployment.
From the OCP Console select . In the search box type “acm”.

Click Install.

After install completes, open the newly installed operator. Select MultiClusterHub tab and click “Create MultiClusterHub”.

Accept the defaults and click “Create”.

Be patient several containers are pulled and started. You can monitor the progress by watching the pods in the “multicluster-engine” and “open-cluster-management” namespace.
oc get pods -n open-cluster-management

oc get pods -n multicluster-engine
Basic / Manual Config
Simple config to get started. The following steps will create the following objects:
Host inventory (Connected or Disconnected)
Credentials
Infrastructure environment
Add host inventory
Host inventory (Connected)
Patch the provisioning-configuration to watch all name spaces.
oc patch provisioning provisioning-configuration --type merge \
  --patch '{"spec":{"watchAllNamespaces": true }}'
From the console select . Click .

Configure host inventory settings and click “Configure”.
Warning
For disconnected environments skip to next section.

Attention
Be patient this process will take some time. For a connected environment several images need to be pulled down. You can monitor this process with the following commands. Wait for the pod to fully start.
oc get pod assisted-image-service-0 -n multicluster-engine

oc logs assisted-image-service-0 -n multicluster-engine -f
Host inventory (Disconnected)
Patch the provisioning-configuration to watch all name spaces.
oc patch provisioning provisioning-configuration --type merge \
  --patch '{"spec":{"watchAllNamespaces": true }}'
Create the following configmap referencing your disconnected registry.
Important
In my lab I found the following four references were required. Your environment may require others. I plan on manually adding the other operators/registries post install.
apiVersion: v1
kind: ConfigMap
metadata:
  name: assisted-installer-mirror-config
  namespace: multicluster-engine
  labels:
    app: assisted-service
data:
  ca-bundle.crt: |
    -----BEGIN CERTIFICATE-----
    <Use rootCA.pem from your mirror registry here>
    -----END CERTIFICATE-----
  registries.conf: |
    unqualified-search-registries = ["registry.access.redhat.com", "docker.io"]
    [[registry]]
       prefix = ""
       location = "quay.io/openshift-release-dev/ocp-v4.0-art-dev"
       mirror-by-digest-only = true
       [[registry.mirror]]
       location = "mirror.lab.local:8443/openshift/release"
    [[registry]]
       prefix = ""
       location = "quay.io/openshift-release-dev/ocp-release"
       mirror-by-digest-only = true
       [[registry.mirror]]
       location = "mirror.lab.local:8443/openshift/release-images"
    [[registry]]
       prefix = ""
       location = "registry.redhat.io/multicluster-engine"
       mirror-by-digest-only = true
       [[registry.mirror]]
       location = "mirror.lab.local:8443/multicluster-engine"
    [[registry]]
       prefix = ""
       location = "registry.redhat.io/rhacm2"
       mirror-by-digest-only = true
       [[registry.mirror]]
       location = "mirror.lab.local:8443/rhacm2"
Apply the newly created file.
oc apply -f assisted-installer-mirror-config.yaml
Before creating the agent service config we need to identify the variables for each version of OCP you plan on deploying. This information will be included in the osImages section of the AgentServiceConfig (Host environment settings).
Obtain the RHCOS ISO and RootFS IMG from: mirror.openshift.com
Important
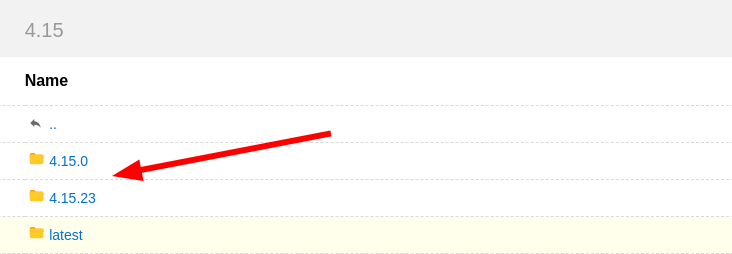
Each OCP version may have more then one option. The version you plan to deploy will dictate which version to download. For example 4.15; If 4.15.22 or lower, select 4.15.0. If 4.15.23 and higher, select 4.15.23. In my case I need both.
Set the environment variables
OCP_VERSION=4.15.14
ARCH=x86_64
If needed download the version specific openshift installer.
curl -L -k https://mirror.openshift.com/pub/openshift-v4/clients/ocp/$OCP_VERSION/openshift-install-linux.tar.gz \
-o openshift-install-linux-$OCP_VERSION.tar.gz
Extract the installer.
tar -xzvf openshift-install-linux-$OCP_VERSION.tar.gz
mv openshift-install openshift-install-$OCP_VERSION
rm README.md
Extract the RHCOS Live Version. Save this info for next step.
./openshift-install-$OCP_VERSION coreos print-stream-json | grep location | grep $ARCH | grep iso | cut -d\/ -f10
Repeat steps a - e for each version.
Create the AgentServiceConfig with reference to the config map created in step A. Adjust your storage requirements as needed, I’m using default values. Add each osImage you plan on deploying for spoke clusters. The version information from last step will be used here.
Important
The highlighted annotation below is critical for the disconnected discovery ISO to work with 4.19+. Without it discovery will not work.
Note
When creating multiple osImages discovery will be based on the latest version.
apiVersion: agent-install.openshift.io/v1beta1
kind: AgentServiceConfig
metadata:
  name: agent
  annotations:
    unsupported.agent-install.openshift.io/assisted-service-allow-unrestricted-image-pulls: "true"
spec:
  databaseStorage:
    accessModes:
    - ReadWriteOnce
    resources:
      requests:
        storage: 10Gi
  filesystemStorage:
    accessModes:
    - ReadWriteOnce
    resources:
      requests:
        storage: 100Gi
  imageStorage:
    accessModes:
    - ReadWriteOnce
    resources:
      requests:
        storage: 50Gi
  mirrorRegistryRef:
    name: assisted-installer-mirror-config
  osImages:
    - openshiftVersion: "4.18"
      cpuArchitecture: "x86_64"
      version: "418.94.202510081222-0"
      url: "http://192.168.1.72/rhcos/rhcos-4.18.27-x86_64-live.x86_64.iso"
      rootFSUrl: "http://192.168.1.72/rhcos/rhcos-4.18.27-x86_64-live-rootfs.x86_64.img"
    - openshiftVersion: "4.19"
      cpuArchitecture: "x86_64"
      version: "9.6.20251023-0"
      url: "http://192.168.1.72/rhcos/rhcos-4.19.23-x86_64-live.x86_64.iso"
      rootFSUrl: "http://192.168.1.72/rhcos/rhcos-4.19.23-x86_64-live-rootfs.x86_64.img"
    - openshiftVersion: "4.20"
      cpuArchitecture: "x86_64"
      version: "9.6.20251023-0"
      url: "http://192.168.1.72/rhcos/rhcos-4.20.12-x86_64-live.x86_64.iso"
      rootFSUrl: "http://192.168.1.72/rhcos/rhcos-4.20.12-x86_64-live-rootfs.x86_64.img"
    - openshiftVersion: "4.21"
      cpuArchitecture: "x86_64"
      version: "9.6.20251212-1"
      url: "http://192.168.1.72/rhcos/rhcos-4.21.0-x86_64-live.x86_64.iso"
      rootFSUrl: "http://192.168.1.72/rhcos/rhcos-4.21.0-x86_64-live-rootfs.x86_64.img"
Apply the agent service config yaml to the cluster.
oc apply -f agentserviceconfig.yaml
Attention
Each iso and img defined in the osImages section will be download to the cluster. You can monitor this process with the following commands. Wait for the pod to fully start.
oc get pod assisted-image-service-0 -n multicluster-engine

oc logs assisted-image-service-0 -n multicluster-engine -f
Create the ClusterImageSet for each hosted version of openshift. In my example I’m hosting 4.15.14, 4.15.28 and 4.16.8. Save the file and apply to cluster “oc apply -f clusterimageset.yaml”.
Note
I’m including all three in one file but three ClusterImageSet’s are created.
apiVersion: hive.openshift.io/v1
kind: ClusterImageSet
metadata:
  labels:
    channel: stable
    visible: 'true'
  name: img4.18.28-x86-64-appsub
spec:
  releaseImage: mirror.lab.local:8443/openshift/release-images:4.18.28-x86_64
---
apiVersion: hive.openshift.io/v1
kind: ClusterImageSet
metadata:
  labels:
    channel: stable
    visible: 'true'
  name: img4.19.23-x86-64-appsub
spec:
  releaseImage: mirror.lab.local:8443/openshift/release-images:4.19.23-x86_64
---
apiVersion: hive.openshift.io/v1
kind: ClusterImageSet
metadata:
  labels:
    channel: stable
    visible: 'true'
  name: img4.20.12-x86-64-appsub
spec:
  releaseImage: mirror.lab.local:8443/openshift/release-images:4.20.12-x86_64
Credentials
From the CLI create a new project/namespace for your spoke cluster objects.
oc new-project <project_name>
Tip
I recommend making the project_name the domain name with no dots.
For example: “lab.local” == “lablocal”
Connect to the console and switch from “local-cluster” to “All Clusters”.

Configure credentials. Select “Credentials” then click “Add credentials”.

Select Credential Type. In my lab/example I’m using Host Inventory.

Enter the basic credential information and click Next.

Add your “Pull secret” and “SSH public key” and click Next.
Note
If disconnected environment be sure to include/add your on-prem registry / mirror credentials.

Review and click Add.
Infrastructure environment
From the console select . Click .

Enter the information for your infrastructure environment. Click “Create” when finished.
Note
Use the previously created credentials in the “Infrastructure provider credentials” drop down list.

Add host inventory
To add hosts to the “Host Inventory” use the following script and CSV file. Together it creates three objects in the “output” directory.
Tip
When removing these objects be sure to do it via the console. Doing so via the cli will leave orphaned objects.
Secret
NMStateConfig
BareMetalHost
Create the following CSV file for your environment.
Attention
In this CSV file example I have 5 VM’s. I’m using Sushi Redfish emulater for remote management.
HOST,BMCIP,HOSTIP,MAC1,UUID
host11,192.168.1.72:8000,192.168.122.11,52:54:00:f4:16:11,0ef41f53-b22b-4809-a8e4-6fd76b1385af
host12,192.168.1.72:8000,192.168.122.12,52:54:00:f4:16:12,9ccd79b0-d21c-494d-a51a-8d08a371cc8f
host13,192.168.1.72:8000,192.168.122.13,52:54:00:f4:16:13,8ac8719f-12fc-43e9-a04c-e3647af877f9
host14,192.168.1.72:8000,192.168.122.14,52:54:00:f4:16:14,d3386573-afed-4958-a2ab-2d7f3d68c69d
host15,192.168.1.72:8000,192.168.122.15,52:54:00:f4:16:15,16d40706-3939-497a-afa0-4ec83ae152a8
Create the following script.
Important
You may need to change or add variables for your environment.
Note
The Secret username and password are base64 encoded.
  1#/bin/bash
  2
  3# Create output dir if not exists, delete old one if exists.
  4
  5if [[ -d output ]]; then
  6    rm -rf output
  7    mkdir -p output
  8else
  9    mkdir -p output
 10fi
 11
 12# Take "nodes" CSV and create bare-metal resources for cluster.
 13
 14for host in `cat nodes | grep -v HOST`; do
 15HOST=`grep $host nodes | awk -F "," '{print $1}'`;
 16BMCIP=`grep $host nodes | awk -F "," '{print $2}'`;
 17HOSTIP=`grep $host nodes | awk -F "," '{print $3}'`;
 18MAC1=`grep $host nodes | awk -F "," '{print $4}'`;
 19UUID=`grep $host nodes | awk -F "," '{print $5}'`;
 20
 21# Secret
 22
 23cat <<EOF > ./output/$HOST-secret.yaml
 24apiVersion: v1
 25data:
 26  password: a25p
 27  username: a25p
 28kind: Secret
 29metadata:
 30  name: bmc-$HOST
 31  namespace: lablocal
 32type: Opaque
 33EOF
 34
 35# NMStateConfig
 36
 37cat <<EOF > ./output/$HOST-nmstate.yaml
 38apiVersion: agent-install.openshift.io/v1beta1
 39kind: NMStateConfig
 40metadata:
 41  labels:
 42    agent-install.openshift.io/bmh: $HOST
 43    infraenvs.agent-install.openshift.io: lablocal
 44  name: $HOST
 45  namespace: lablocal
 46spec:
 47  interfaces:
 48    - macAddress: $MAC1
 49      name: enp1s0
 50  config:
 51    interfaces:
 52      - name: enp1s0
 53        type: ethernet
 54        mtu: 1500
 55        state: up
 56        ipv4:
 57          enabled: false
 58        ipv6:
 59          enabled: false
 60      - name: enp1s0.122
 61        type: vlan
 62        state: up
 63        vlan:
 64          base-iface: enp1s0
 65          id: 122
 66        ipv4:
 67          enabled: true
 68          dhcp: false
 69          address:
 70            - ip: $HOSTIP
 71              prefix-length: 24
 72        ipv6:
 73          enabled: false
 74    dns-resolver:
 75      config:
 76        search:
 77          - lab.local
 78        server:
 79          - 192.168.1.68
 80    routes:
 81      config:
 82        - destination: 0.0.0.0/0
 83          next-hop-address: 192.168.122.1
 84          next-hop-interface: enp1s0.122
 85          table-id: 254
 86EOF
 87
 88# BareMetalHost
 89
 90cat <<EOF > ./output/$HOST-baremetal.yaml
 91apiVersion: metal3.io/v1alpha1
 92kind: BareMetalHost
 93metadata:
 94  annotations:
 95    bmac.agent-install.openshift.io/hostname: $HOST
 96    inspect.metal3.io: ""
 97  labels:
 98    infraenvs.agent-install.openshift.io: lablocal
 99  name: $HOST
100  namespace: lablocal
101spec:
102  automatedCleaningMode: metadata
103  rootDeviceHints:
104    deviceName: "/dev/vda"
105  bmc:
106    address: redfish-virtualmedia+http://$BMCIP/redfish/v1/Systems/$UUID
107    credentialsName: bmc-$HOST
108    disableCertificateVerification: true
109  bootMACAddress: $MAC1
110  customDeploy:
111    method: start_assisted_install
112  online: true
113EOF
114
115done;
116
117echo -e "\n\nTo create the inventory run \"oc create -f output/\"."
Run script and create openshift objects.
./script.sh
oc create -f output/
Tip
Monitor BMH progress
oc logs metal3-baremetal-operator-675565dfc-7stdm -n openshift-machine-api --follow
GitOps
Tip
Clone my github repo. All the files listed below are included, modify as needed.
git clone https://github.com/vtog/gitops.git
Install operators
For GitOps two operators are required:
Red Hat OpenShift GitOps
Topology Aware Lifecycle Manager
Both operators can be found on the OperatorHub and for this lab the default config is all that is needed. Simply accept the defaults and click “Install”.
Host inventory
Just like the basic/manual config, we need to configure the host inventory first. This can be done connected or disconnected:
For connected see Host inventory (Connected)
For disconnected see Host inventory (Disconnected)
Environment / Cluster
From the cli create the following yaml manifests and apply them to your hub cluster. When finished you’ll have a SNO cluster running.
Tip
Use the “kustomization.yaml” to create the manifests
oc create -k ./<manifest-dir>. This process can be used to test the
manifests for errors before gitops automation.
00-namespace.yaml
01-unsealed-bmc-secret.yaml
02-unsealed-pull-secret.yaml
03-agentclusterinstall.yaml
04-clusterdeployment.yaml
05-klusterlet.yaml
06-managedcluster.yaml
07-nmstate.yaml
08-infraenv.yaml
09-baremetalhost.yaml
kustomization.yaml
apiVersion: v1
kind: Namespace
metadata:
  name: ztp-spoke-01
apiVersion: v1
data:
  password: a25p
  username: a25p
kind: Secret
metadata:
  labels:
    app.kubernetes.io/instance: clusters
  name: bmc-secret
  namespace: ztp-spoke-01
type: Opaque
# After creating the secret use the following to set the data with your custom docker config json.
# oc set data secret/pull-secret --from-file=.dockerconfigjson=/home/vince/.docker/config.json -n ztp-spoke-01
# or
# oc create secret docker-registry --from-file=.dockerconfigjson=/home/vince/.docker/config.json pull-secret -n ztp-spoke-01

apiVersion: v1
data:
  .dockerconfigjson: ewoJImF1dGhzIjogewoJICAibWlycm9yLmxhYi5sb2NhbDo4NDQzIjogewogICAgICAiYXV0aCI6ICJhVzVwZERwd1lYTnpkMjl5WkE9PSIKICAgIH0KICB9Cn0K
kind: Secret
metadata:
  name: pull-secret
  namespace: ztp-spoke-01
apiVersion: extensions.hive.openshift.io/v1beta1
kind: AgentClusterInstall
metadata:
  annotations:
    agent-install.openshift.io/install-config-overrides: '{"networking":{"networkType":"OVNKubernetes"}}'
    argocd.argoproj.io/sync-wave: '1'
    ran.openshift.io/ztp-gitops-generated: '{}'
  labels:
    app.kubernetes.io/instance: clusters
  name: ztp-spoke-01
  namespace: ztp-spoke-01
spec:
  clusterDeploymentRef:
    name: ztp-spoke-01
  imageSetRef:
    name: img4.16.8-x86-64-appsub
  networking:
    clusterNetwork:
      - cidr: 10.128.0.0/14
        hostPrefix: 23
    machineNetwork:
      - cidr: 192.168.132.0/24
    serviceNetwork:
      - 172.30.0.0/16
  provisionRequirements:
    controlPlaneAgents: 1
    workerAgents: 0
  sshPublicKey: <redacted>
apiVersion: hive.openshift.io/v1
kind: ClusterDeployment
metadata:
  name: ztp-spoke-01
  namespace: ztp-spoke-01
spec:
  baseDomain: lab.local
  clusterName: ztp-spoke-01
  controlPlaneConfig:
    servingCertificates: {}
  installed: false
  clusterInstallRef:
    group: extensions.hive.openshift.io
    kind: AgentClusterInstall
    name: ztp-spoke-01
    version: v1beta1
  platform:
    agentBareMetal:
      agentSelector:
        matchLabels:
          cluster-name: "ztp-spoke-01"
  pullSecretRef:
    name: pull-secret
apiVersion: agent.open-cluster-management.io/v1
kind: KlusterletAddonConfig
metadata:
  name: ztp-spoke-01
  namespace: ztp-spoke-01
spec:
  applicationManager:
    argocdCluster: false
    enabled: true
  certPolicyController:
    enabled: true
  clusterLabels:
    name: ztp-spoke-01
    cloud: Baremetal
    vendor: auto-detect
  clusterName: ztp-spoke-01
  clusterNamespace: ztp-spoke-01
  iamPolicyController:
    enabled: true
  policyController:
    enabled: true
  searchCollector:
    enabled: true
  version: 2.6.2
apiVersion: cluster.open-cluster-management.io/v1
kind: ManagedCluster
metadata:
  name: ztp-spoke-01
  namespace: ztp-spoke-01
  labels:
    name: ztp-spoke-01
spec:
  hubAcceptsClient: true
  leaseDurationSeconds: 60
apiVersion: agent-install.openshift.io/v1beta1
kind: NMStateConfig
metadata:
  name: ztp-spoke-01
  namespace: ztp-spoke-01
  labels:
    cluster-name: ztp-spoke-01
spec:
  interfaces:
    - name: enp1s0
      macAddress: 52:54:00:f4:16:21
  config:
    interfaces:
      - name: enp1s0
        type: ethernet
        mtu: 1500
        state: up
      - name: enp1s0.132
        type: vlan
        state: up
        vlan:
          base-iface: enp1s0
          id: 132
        ipv4:
          enabled: true
          dhcp: false
          address:
            - ip: 192.168.132.21
              prefix-length: 24
        ipv6:
          enabled: false
    dns-resolver:
      config:
        search:
          - lab.local
        server:
          - 192.168.1.68
    routes:
      config:
        - destination: 0.0.0.0/0
          next-hop-address: 192.168.132.1
          next-hop-interface: enp1s0.132
          table-id: 254
apiVersion: agent-install.openshift.io/v1beta1
kind: InfraEnv
metadata:
  name: ztp-spoke-01
  namespace: ztp-spoke-01
  annotations:
    argocd.argoproj.io/sync-options: Validate=false
spec:
  additionalNTPSources:
    - 192.168.1.68
  clusterRef:
    name: ztp-spoke-01
    namespace: ztp-spoke-01
  sshAuthorizedKey: '<redacted>'
  agentLabelSelector:
    matchLabels:
      cluster-name: ztp-spoke-01
  pullSecretRef:
    name: pull-secret
  nmStateConfigLabelSelector:
    matchLabels:
      cluster-name: ztp-spoke-01
apiVersion: metal3.io/v1alpha1
kind: BareMetalHost
metadata:
  annotations:
    inspect.metal3.io: disabled
    bmac.agent-install.openshift.io/hostname: "ztp-spoke-01"
  labels:
    infraenvs.agent-install.openshift.io: "ztp-spoke-01"
  name: ztp-spoke-01
  namespace: ztp-spoke-01
spec:
  automatedCleaningMode: metadata
  rootDeviceHints:
    deviceName: /dev/vda
  bmc:
    address: redfish-virtualmedia+http://192.168.1.72:8000/redfish/v1/Systems/4df1a257-6ab8-4de9-a530-1781da98aa98
    credentialsName: bmc-secret
    disableCertificateVerification: true
  bootMACAddress: '52:54:00:f4:16:21'
  bootMode: UEFI
  online: true
apiVersion: kustomize.config.k8s.io/v1beta1
kind: Kustomization

resources:
  - 00-namespace.yaml
  - 01-unsealed-bmc-secret.yaml
  - 02-unsealed-pull-secret.yaml
  - 03-agentclusterinstall.yaml
  - 04-clusterdeployment.yaml
  - 05-klusterlet.yaml
  - 06-managedcluster.yaml
  - 07-nmstateconfig.yaml
  - 08-infraenv.yaml
  - 09-baremetalhost.yaml
Automation
From the ACM console view select: from the menu. Click “Create application” and select “Subscription”.

Add the name and namespace for the cluster and select “Git”.
Important
Use the same name and namespace used in your manifests. 00-namespace.yaml is not part of the kustomization yaml so creating the right namespace is critical.

Add your repo info for the cluster. In my lab I only need:
URL
Branch
Path

After adding repo info scroll down to “Cluster sets” and select “default”. Then click “Create” in the upper right corner.